
Index
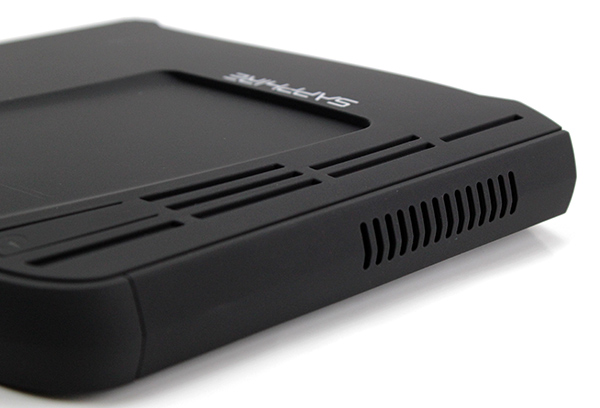
The Edge VS got a new chassis which is a little bit brighter, wider and taller that the Edge HD. However, it is still small enough to be mounted on the back of a TV using provided VESA mount. Bear in mind that the Edge HD is tiny, so a few millimetres at the girth don’t mean much. The Edge VS looks more futuristic than the Edge HD and personally I like the new design. It is a bit more lively than the minimalistic and somewhat monotonous Edge HD. At first glance I assumed that the vents on the sides were put there to improve airflow, but they are merely decorative. There are no air vents on the sides and the VS8 relies on a few openings at the bottom and top to ensure airflow. It’s not enough, but we’ll get to that later.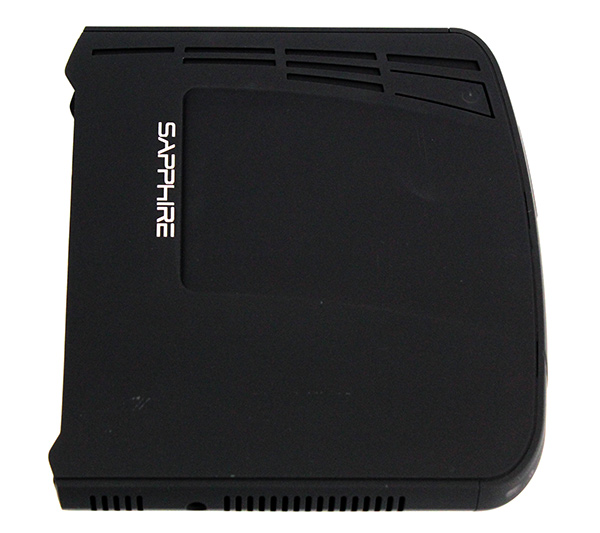
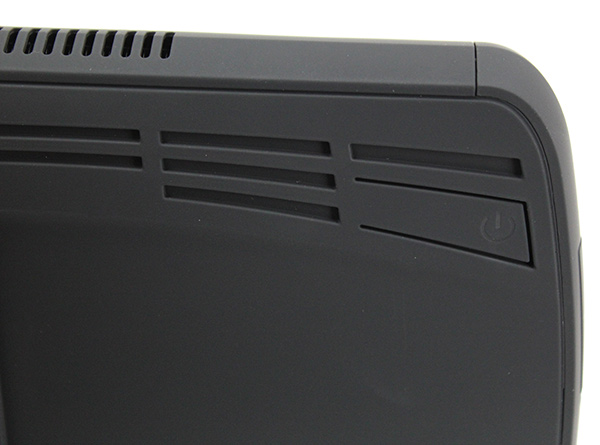
The power button is the only button on the Edge VS8. It features a power indicator light underneath. The power button is clearly visible only when the VS8 is turned on. The thin LED strips at the front surround the SD card reader and USB ports. They are thin and relatively dim, so they will not distract you if you place the VS8 next to your TV.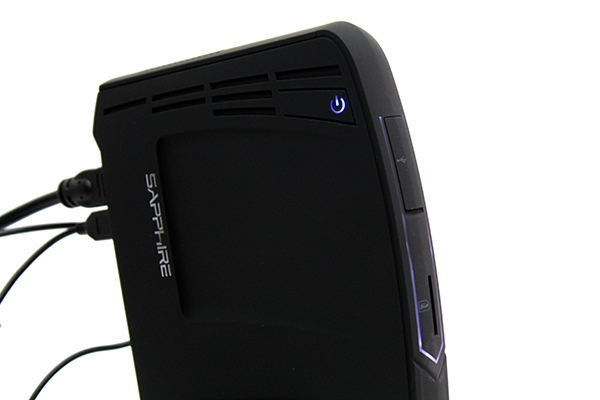
The Edge VS8 features two USB 3.0 ports that will come in quite handy for speedy external storage. The USB 3.0 ports are placed at the front along with SD/MMC card reader. USB 3.0 ports are hidden under a little protective cover as shown on the images below. 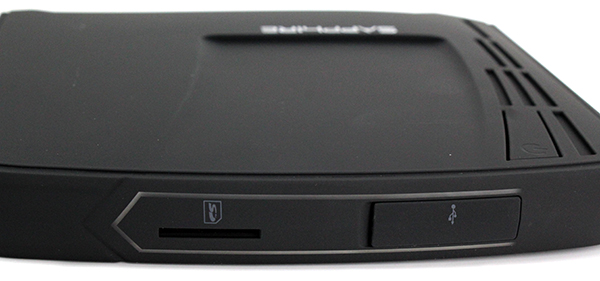
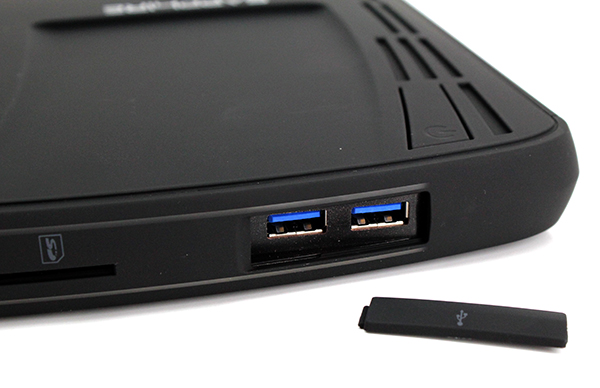
On the Edge HD the USB flap is held in place with a rubber catch so it will not be lost. Unfortunately this is not the case on the Edge VS. Placing both USB 3.0 ports at the front is not a good idea, either. In case you plan on using USB 3.0 storage on a permanent basis, you will have to remove the decorative flap and end up with cables sticking out of both sides of the system.
Power indicator light and HDD / WiFi activity indicator light are clearly visible and are placed at the bottom corner.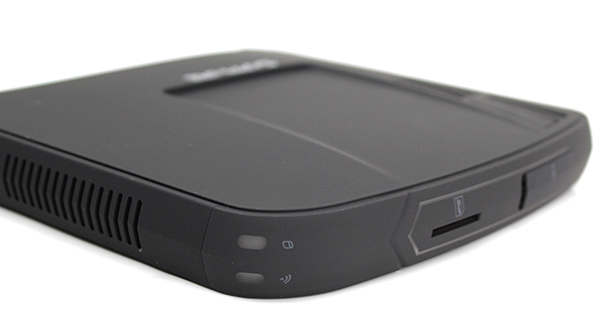
The right mirrors the left side and the only difference is that there is no button on this side.
One of the first things you will have to do when setting up the Edge VS8 is to attach the desktop stand. In terms of aesthetics and build quality of the VS8 chassis, we have no complaints, but the desktop stand could have been a bit better.
The desktop stand is made from metal and it is kept in place by a simple thumb screw located in the middle. The review unit had a few scratches at the sides and once we installed it we realized that the chassis was scratched when someone installed the desktop stand. Sharp metal and rubberized plastic don’t mix and in case you are careless you will scratch the sides. The Edge HD series features a different desktop stand, not as futuristic as the one on the VS8, but it also can’t scratch the chassis. It is an unfortunate oversight to say the least.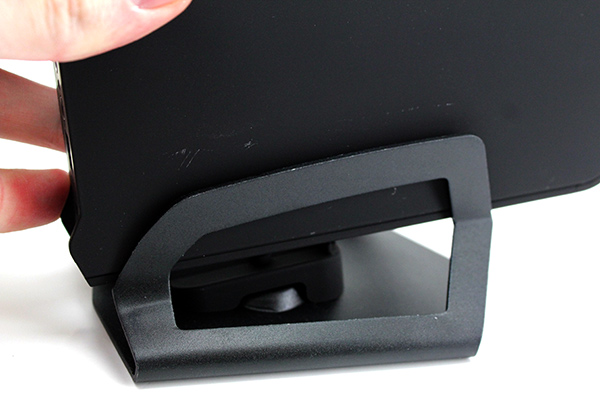
Once we installed the desktop stand we realized that the sides of the chassis don’t even touch the stand, which is rather puzzling and leads us to believe that someone had a rather unfortunate accident with the stand.
This is a minor issue. Just a couple of adhesive strips, or even bits of rubber could prevent direct contact from the desktop stand and the chassis. We strongly advise that you tinker with the desktop stand before you install it and frankly we don’t understand why it wasn’t done at the factory.
Once the desktop stand is on, it feels rather sturdy and quite stable, which is not the case with many nettops.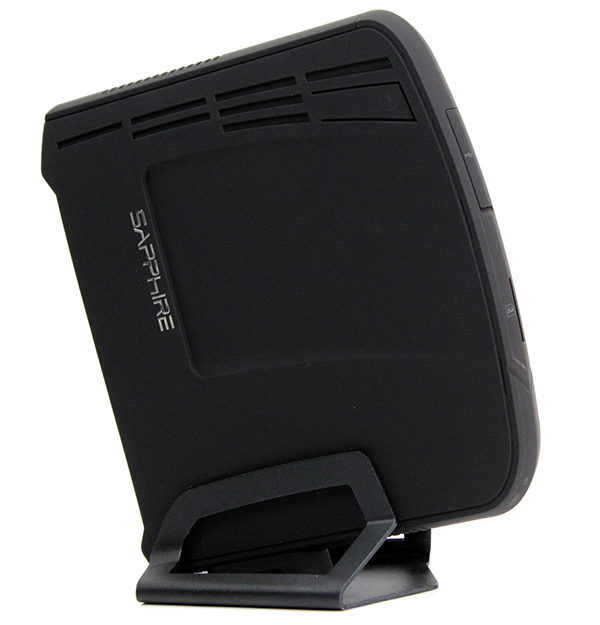
Sapphire decided to ship a VESA mount only with the Edge VS series and not with Edge HD series. With a VESA mount we can easily place the Edge VS8 on the back of a TV. Sadly, with the transition to thin and stylish monitors with LED backlighting, most monitors no longer support VESA mounts. It’s the price of progress.
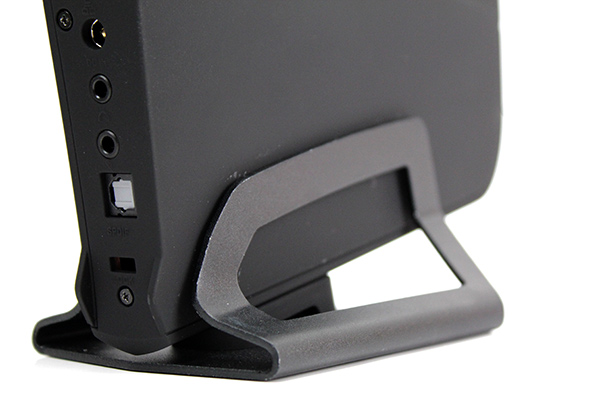
On the rear of the unit you will find the rest of the ports, including video outs, one RJ-45 Gigabit Lan, four USB 2.0 ports, one Line-in (3.5mm jack), one Audio-out (3.5mm jack), one optical S/PDIF, DC In connector, and Kensington lock. Sapphire opted for one HDMI and one mini DisplayPort output. DVI displays can be connected using the HDMI to DVI adapter but there is no default option to connect a VGA-only monitor or projector. The bundled HDMI cable and S/PDIF cable are both 1.5 meters long.
The Clear CMOS button is placed at the top rear side above mini-DisplayPort as shown on the image below.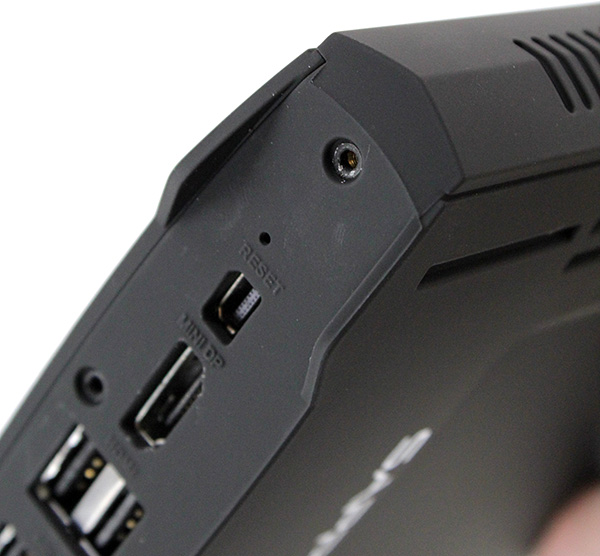
In case you are wondering why the video connectors are not placed at the bottom for added stability, the answer is simple. The connectors are placed close to the APU, i.e. the graphics core. In order to facilitate better cooling, the APU is placed near the top, which means hot air won’t have to circulate around the chassis to exit the top vent.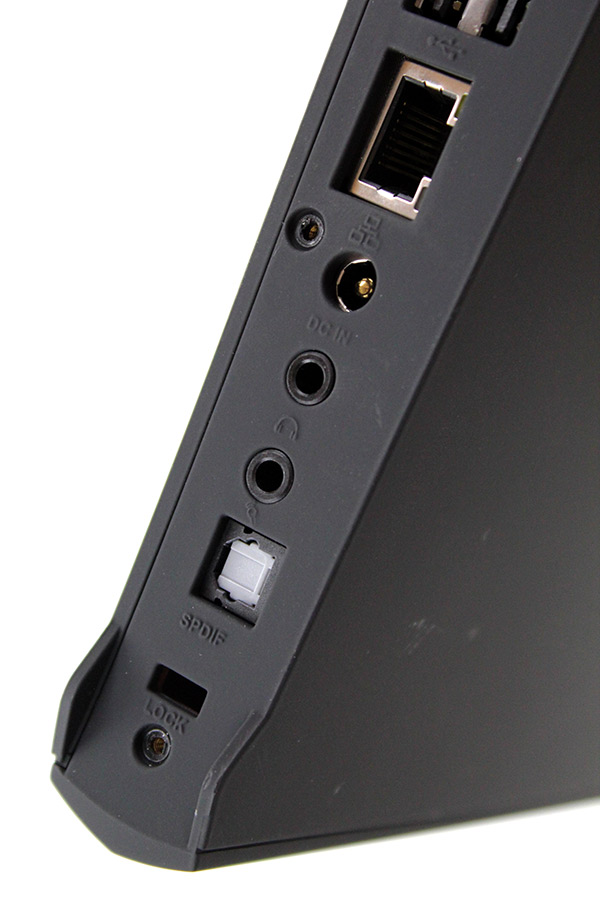
Some vendors ship wireless adapters in the form of a USB stick, but Sapphire decided to use a proper built-in wireless (802.11 b/g/n) adapter along with Bluetooth 3.0. We appreciate this as it reduces bulk and frees up an additional USB port.
In addition to the standard Audio In/Out there is also S/PDIF to connect digital audio devices. All audio connectors at placed at the back, and we think this is good decision. Although some users like to have easy access to audio jacks for headphones, placing the jacks at the back is a much better choice for HTPCs connected to a bunch of speakers. Nobody likes to see their new toy behind a bunch of cables. That’s why we were surprised by the decision to place both USB 3.0 connectors at the front. It was probably impossible to get around this issue due to the layout of the motherboard.