Index


Review: Bag of tricks does the trick
Nanoxia is launching its first computer case dubbed the Deep Silence 1 and the company is quite excited since this is its first. The marketing campaign has been in full swing for a few months already, but if you haven’t caught a glimpse of it, you should know the hype was justified. We'd like to thank pc-cooling.de for kindly providing us with the testing sample.
The name Deep Silence 1 suggests Nanoxia plans to follow up with more cases and we're fine with that. It was built with lots of care and follows the latest trends. At the same time, it sports a few unique and interesting features that, if nothing else, are worth taking a look at.
I knew how the Deep Silence 1 looks but didn’t recognize it once it was out of the box. That was my bad though – the case was upside down.
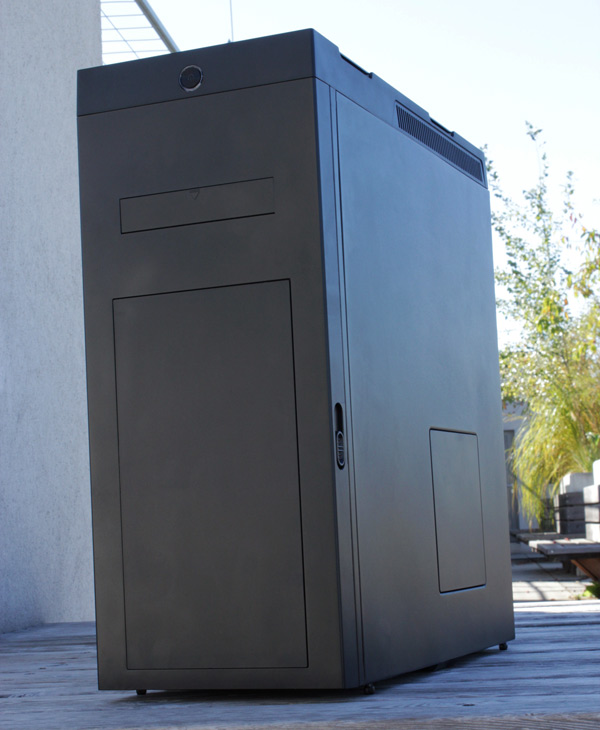
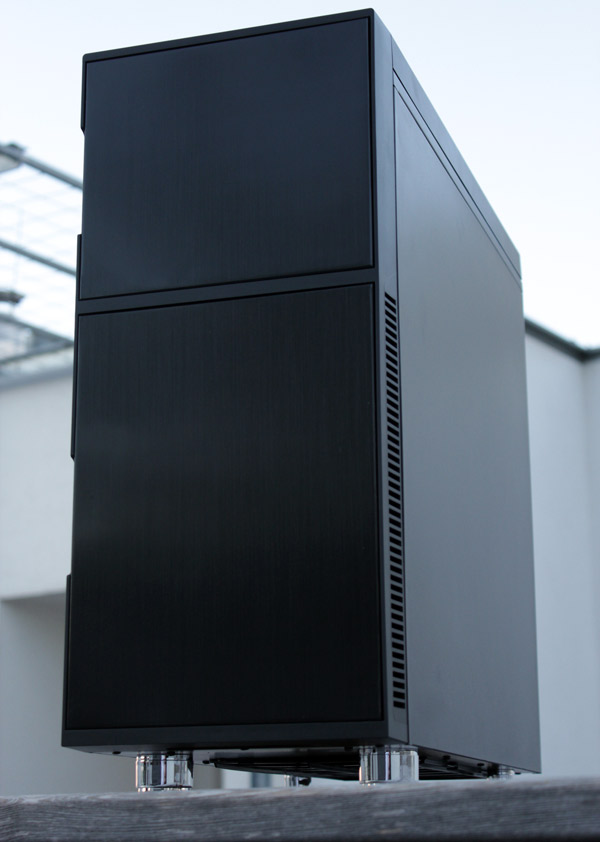
Jokes aside, the Deep Silence 1 relies on simple design for the uniform look. The name already suggests aiming for silence rather than flashy looks, and the case is as sealed off as possible.

Nanoxia made sure to provide plenty of info on the Deep Silence 1 on the package, text and pictures. The end result looks good, but it could use cutout handles for easier carrying.
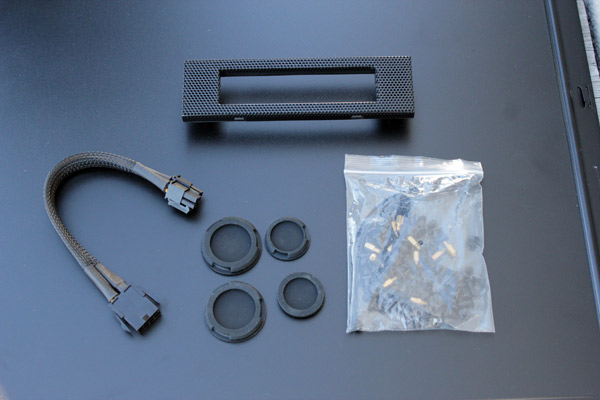
The installation manual is written in German, English, French and Spanish, but has plenty of pictures and descriptions of features. You’ll find an ESP extension cable in the box and solid plugs to replace the water cooling grommets. Nanoxia threw in a 5.25’’-to-3.5’’converter as well, which is a welcome addition at a time when many manufacturers no longer do that.
The front panel has soundproofed doors, confirmation enough for the company’s quest for silence. The doors are made of plastic, but quality piano black finish gives them a metal look. There is no option to flip the location of the door hinges.
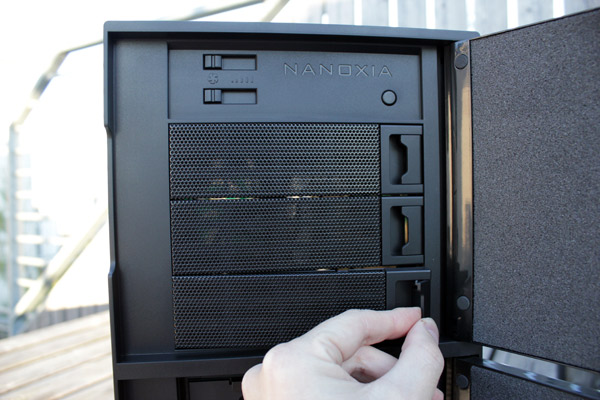
The top door hides three 5.25’’bays, reset switch and 2x fan control. The bottom door hides two 12cm fans.

The 5.25’’ covers are easily removed by pulling the lateral tilting lever cautiously towards you.
Front fans are equipped with an easy to clean dust filter. You can access the fan and/or dustfilter by pushing the arrow on the fan panel.
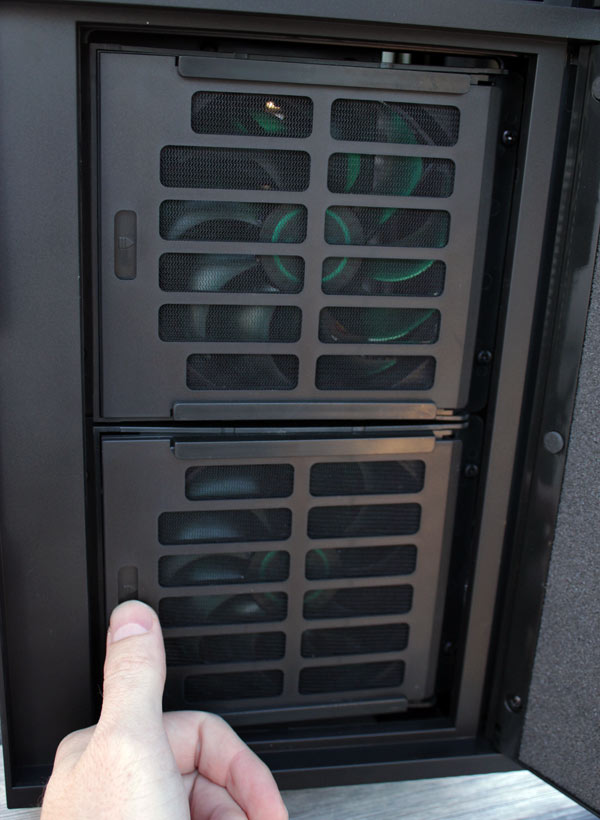
The door blocks all air from the front but the Deep Silence 1 has air intakes on the sides.
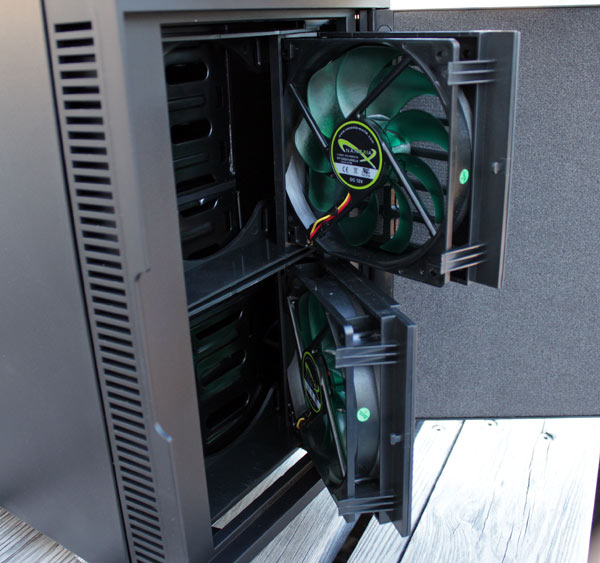
The case has two Nanoxia DS1202512SELN 1300 RPM fans. Taking the fans and their filters out is a breeze.
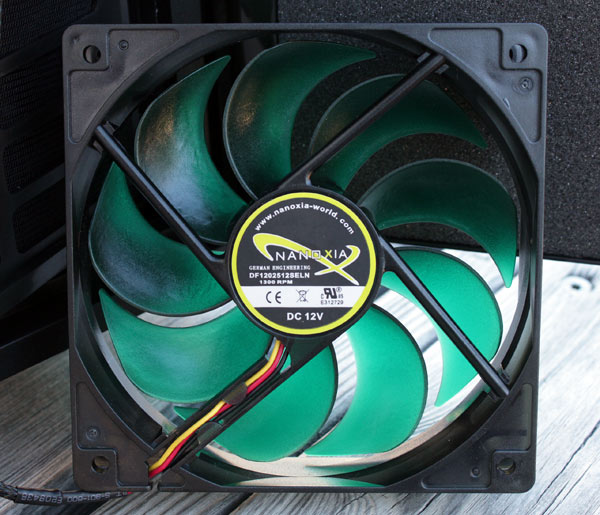
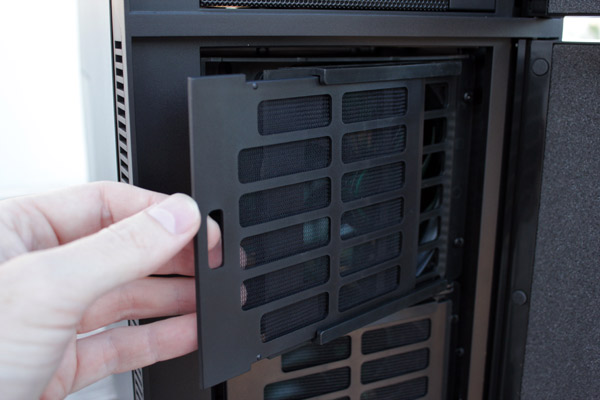
The fan cover utilizes a “click” mechanism. It’s worth noting that although more convenient, these mechanisms are also more prone to wearing out with age and use. In our case, every single one worked flawlessly but owners will probably want to refrain from excessive force after hearing the click, just to be safe. Nanoxia gives a two year warranty with the Deep Silence 1.
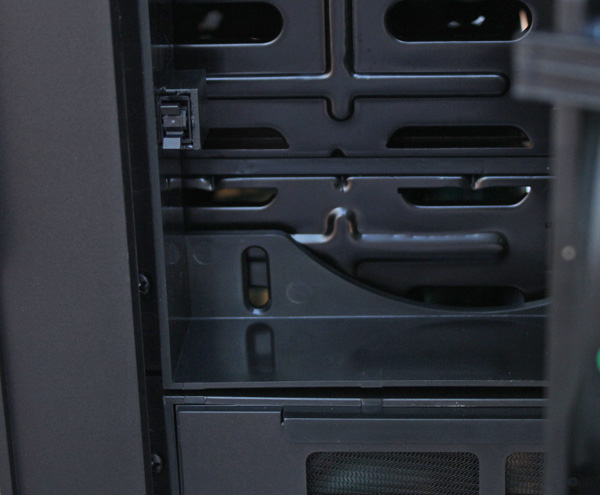
Front door locks rely on magnets, which are a more reliable and durable solution. The following picture shows where the magnets are – the screws mark the spot.
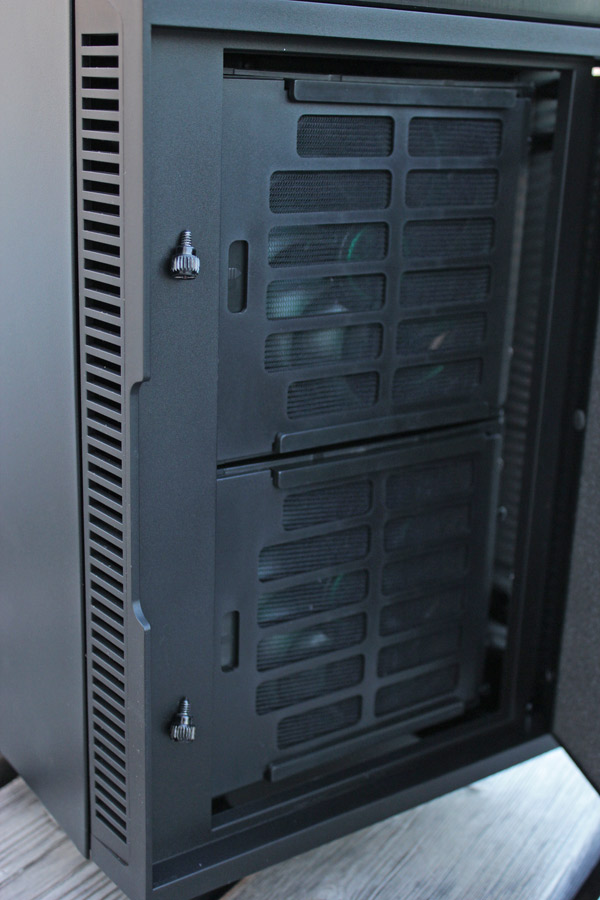
We found a few screw holes in the front panel frame, hidden with foam caps. Some of the caps were quite loose, which is what actually caught our attention in the first place. In fact, had there not been for the caps, we’re sure most users wouldn’t even notice. This of course isn’t something that will affect operation, or even annoy you when it’s behind the door, but it doesn’t do the case much justice either.
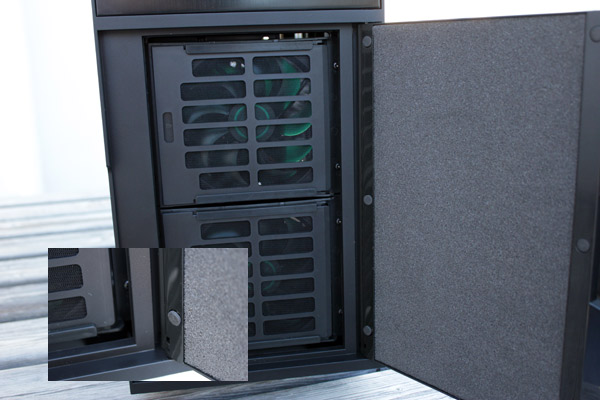
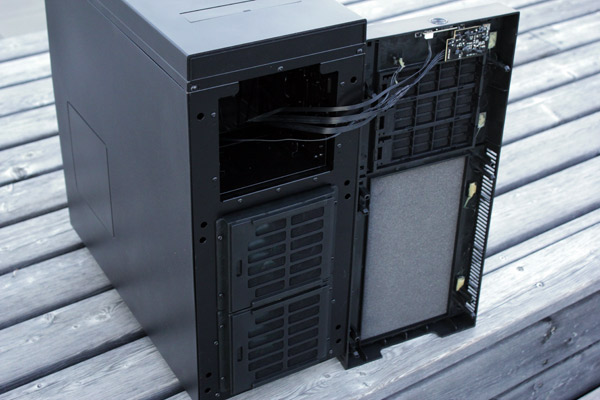
To remove the front panel simply hold the cutout at the bottom of the front panel and pull it towards you with a firm tug. The panel isn’t as polished inside as it is outside. We found traces of glue around magnet holes, but this is the interior after all, so it can be tolerated.
The front panel does not have to be removed unless you want to stick a radiator behind the front fans.
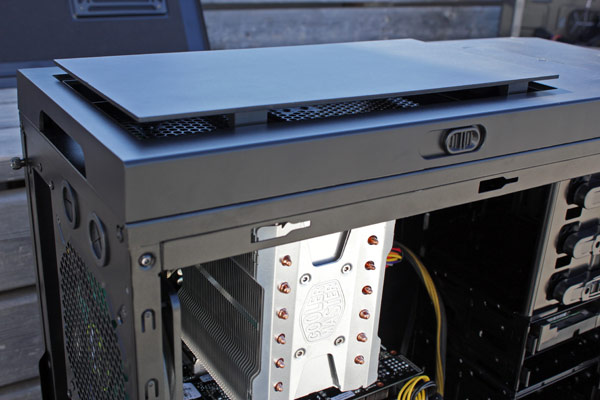
The top panel is sealed off for the computer to be as quiet as possible. Another important feature the Deep Silence 1 is the Air Chimney, which provides additional passive cooling from the top panel. Keeping it closed will maintain the uniform design and silence.
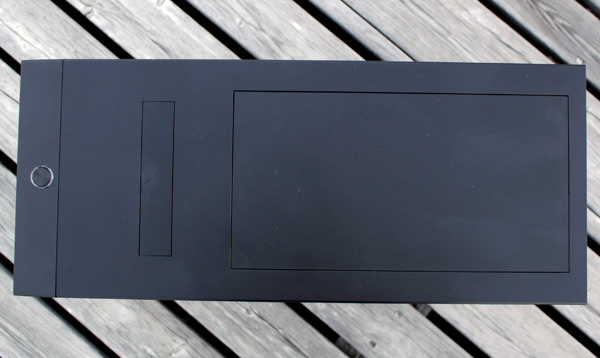

The Air Chimney can easily be opened or closed using the slider on the side of the top cover.
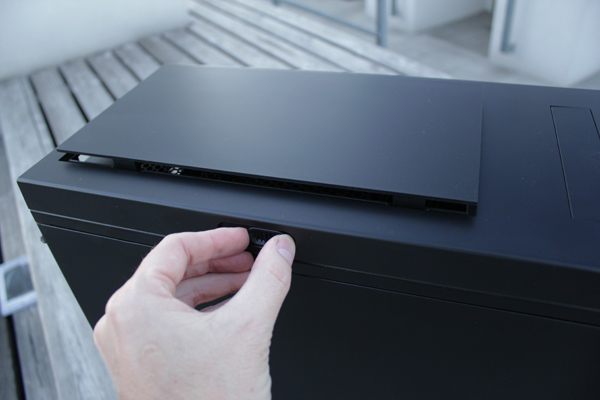
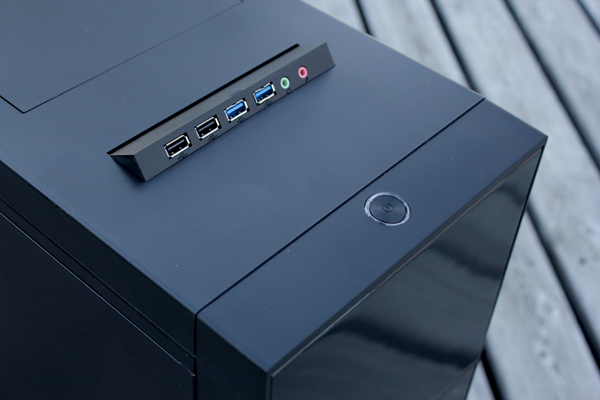
The Deep Silence has two USB 3.0 connectors, two USB 2.0 connectors and audio in/audio out jacks.
The I/O panel can be retracted into the case when not in use, a gentle press until a click will do. ON/OFF is the only key that’s not hidden.
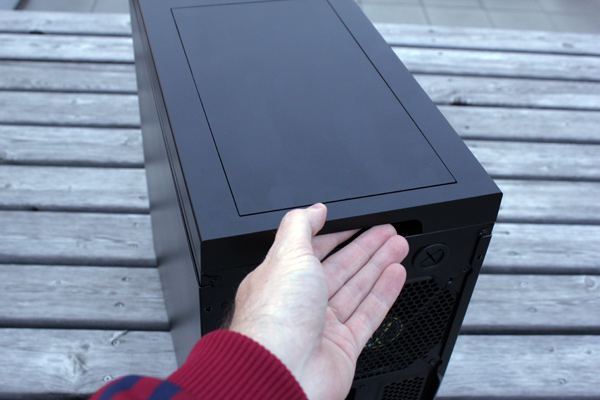
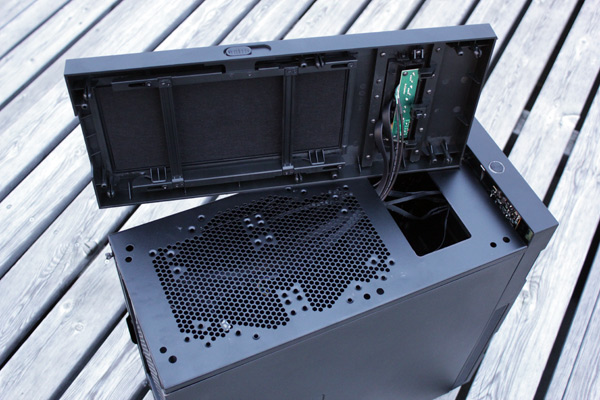
The top panel can house two 140/120mm fans. Setting it up requires taking off the top lid. It is done by holding the recess provided at the rear of the case and pulling it upwards with a firm tug. It didn’t take much effort, and the same goes for the front panel.
The fan should be held inside and secured to the top by fastening the screws from the outside. The fans can be connected to the supplied fan controller.
The right panel is fully closed. The left panel is also closed, but one part of it can be opened if needed.


The panels have a slight matte feel to them and you can see it on the pictures – they scatter light equally. It won’t catch fingerprints easy but it will require cleaning.
The left side panel comes soundproofed. The 2-layer insulating material consists of bitumen layer and layer of foam compound. The right panel wasn’t treated and weighs much less than the left.
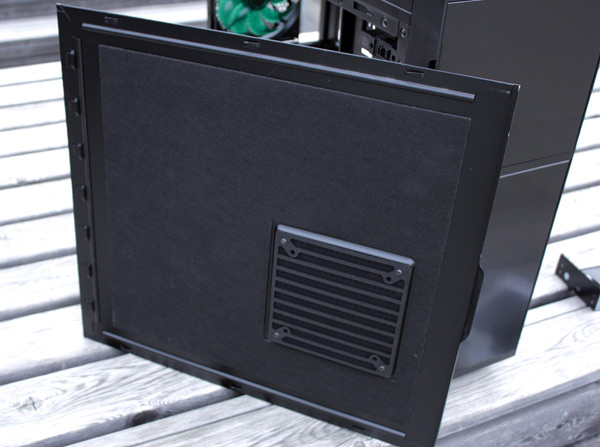
If you want to install a fan in the left side panel, remove the outer cover by loosening the screws inside it. You can leave the dust filter.
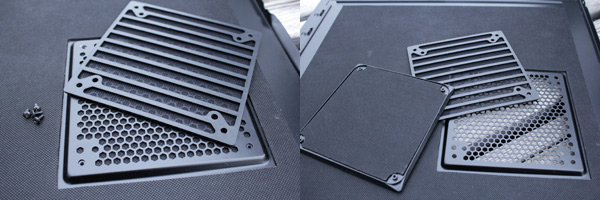
There was no need to treat the right panel as it is closed.
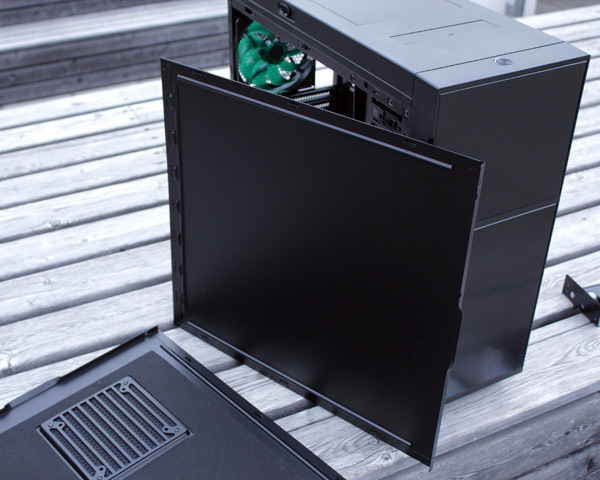
The panels are held in place by two screws and are generally easy to take off on and put back.
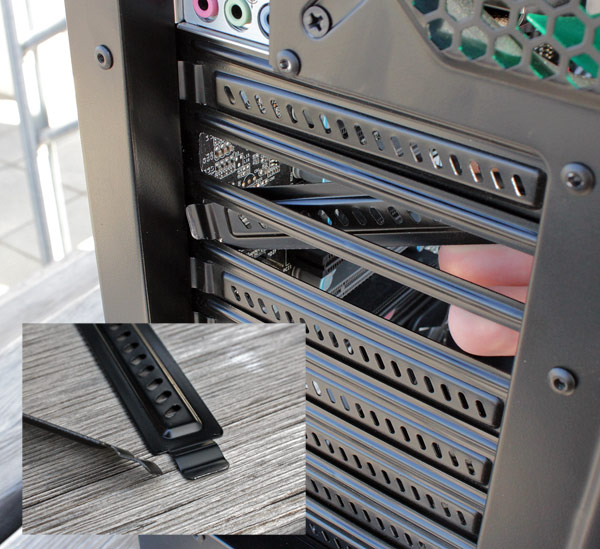
The rear panel houses eight expansioin slots and a single 14cm fan (1100RPM). The expansion holes have mesh covers, although closed covers may seem more fitting for a silent case.
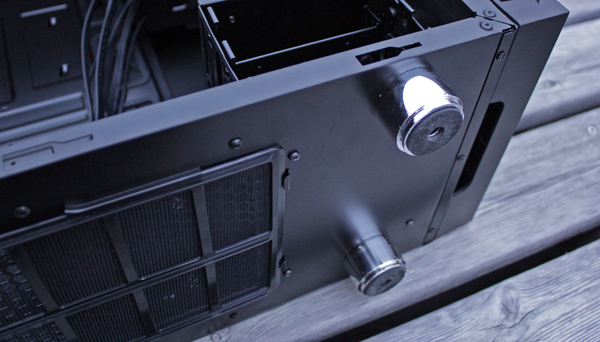
There are four water cooling holes, so that appropriate water cooling components can be operated or mounted externally.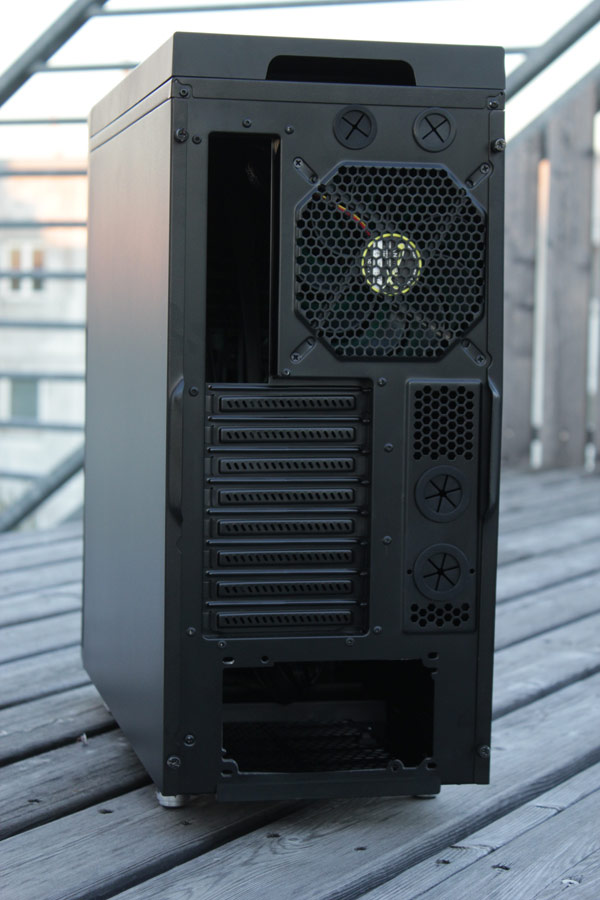
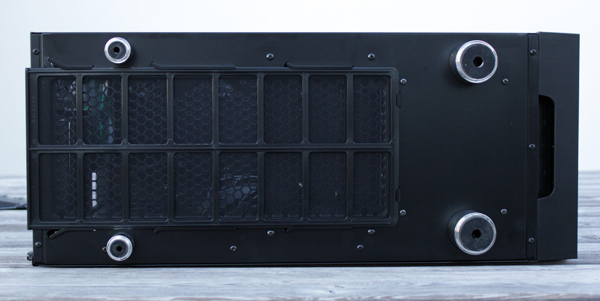
PSU is mounted in the bottom, fan down, but can be mounted facing up as well. The PSU dust filter is removable without opening the case. It’s long enough to cover the 120/140mm fan slot as well. The Deep Silence 1 has 2cm feet and is quite stable on them.
The Deep Silence 1 takes ATX, micro-ATX and mini-ATX motherboards. Nanoxia left a total of nine cable management holes in the motherboard tray. Among the cables we found inside, and there were a lot, we found six fan connectors, originating from the fan controller on the front panel. The controller must be connected to a 4-pin Molex cable. The USB 3.0 connector is internal.
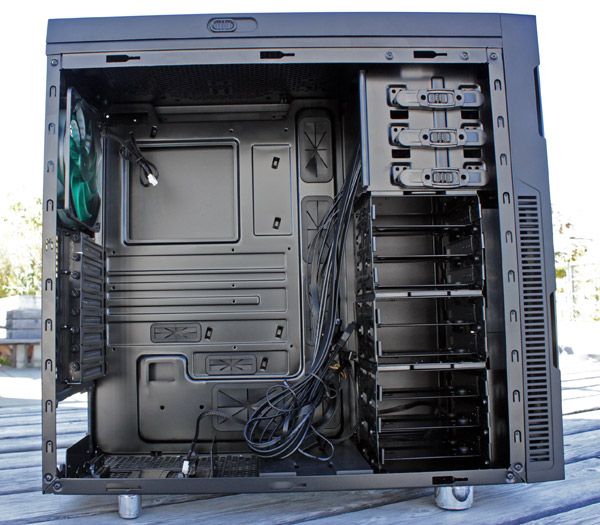
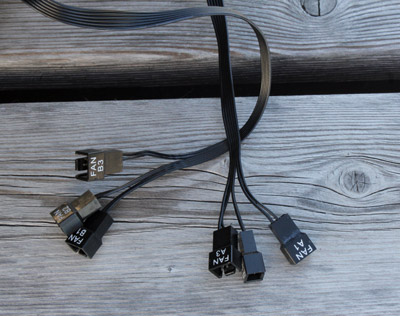
The Deep Silence 1 comes with three installed fans, two of which are 12cm ones on the front and a 14cm one on the rear panel. Additionally, two 12/14cm fans can be mounted on the top panel, a single 12/14cm on the bottom and a 12/14cm fan on the side panel, which means the Deep Silence 1 supports up to seven fans.
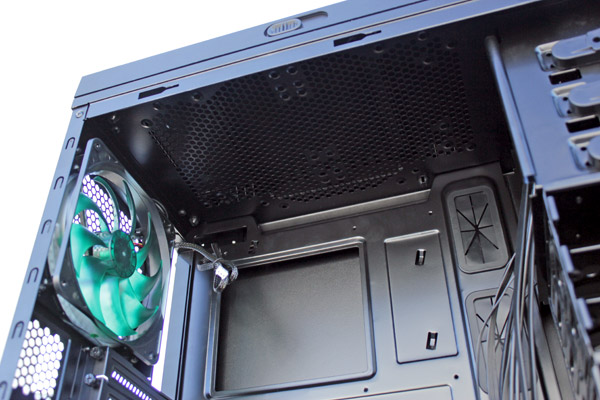
If you decide to strap the Deep Silence with a fan on the bottom panel, you’ll need to take off the plastic part that acts as HDD cage holder. The PSU will be stable thanks to the two rubber feet that although glued to the bottom, will not come off easily.
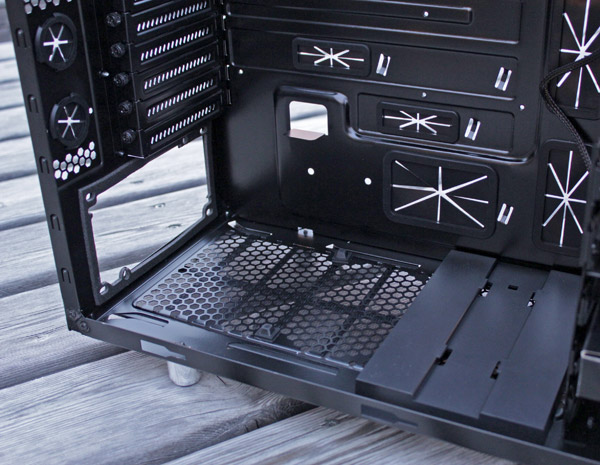
The Deep Silence 1 can take up to eight drives in the three sections of its HDD cage (2x3 HDD 1x2 HDD).
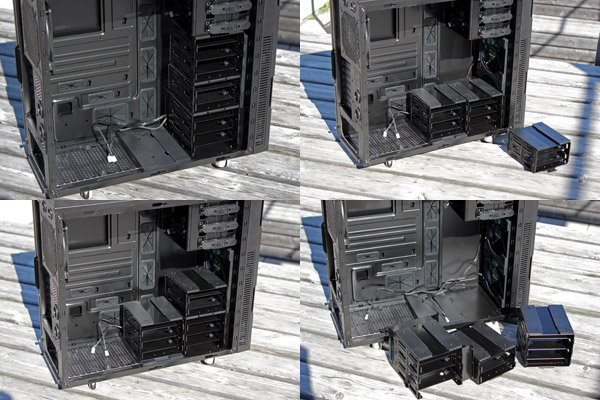
The top two cages are interchangeable and can also be removed if required. Same goes for the bottom one, in case you need to put a 240mm radiator behind the front fans. In order not to run out of HDD space, Nanoxia made sure that a cage can be placed in the designated holder on the bottom, closer to the PSU.
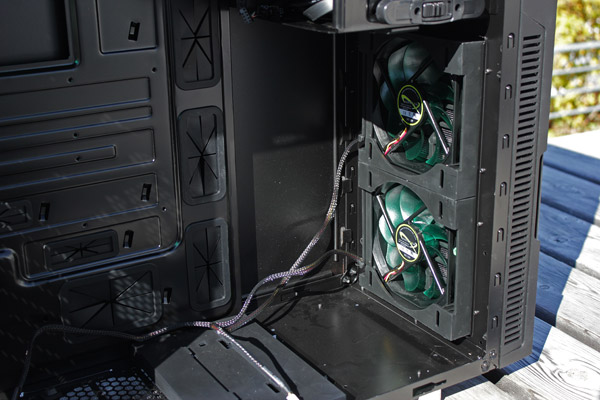
Maximum VGA length is 315mm (up to 445mm with HDD cage removed). Maximum CPU cooler height is up to 185mm.
The hard disk drives are installed on frames which feature rubber grommets (for 3.5” drives). Each mounting frame takes 2.5” or 3.5” drives. In order to extract the frame, squeeze the bracket handles and pull the slider out.
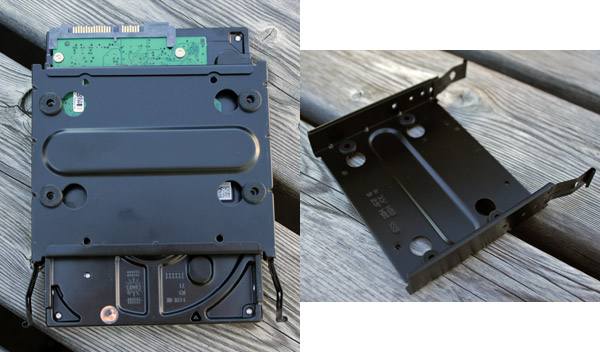
Installing optical drives is tool-less. The Deep Silence 1 comes with a 5.25’’-3.5“ converter in the bottom 5.25’’ slot.
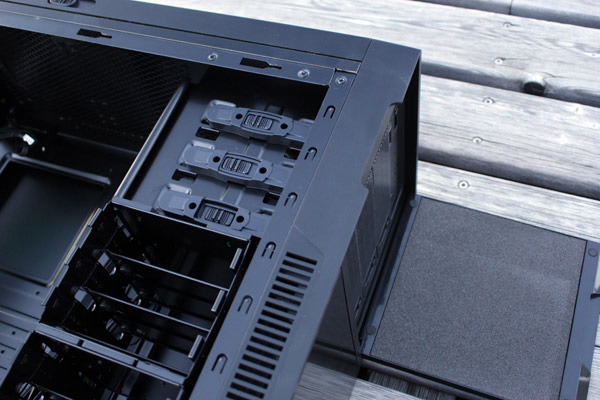
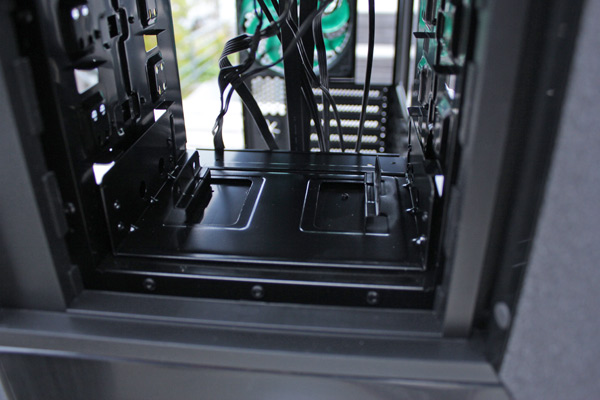
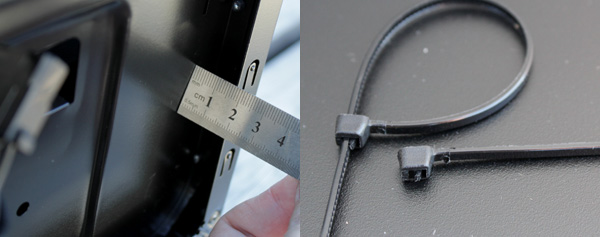
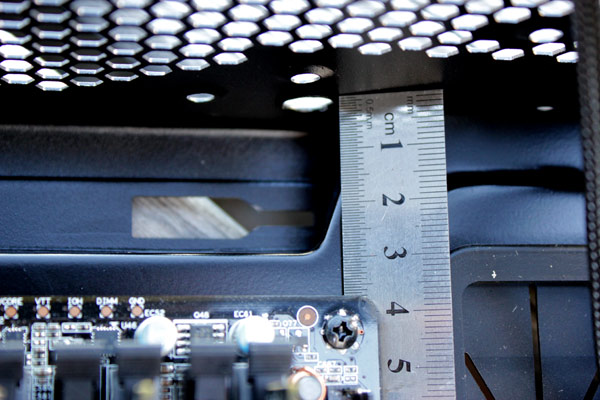
Cable management holes have rubber grommets that are fixed firmly in place and will prevent cable wear and tear. There is about 1.7cm of space between the right panel and motherboard tray.


Towards the top of the tray are two more holes for CPU power and fan cables.

Locking and loading the Deep Silence 1 was easy. Knowing our test board, EVGA’s X58 FTW3, we made sure to mount the CPU cooler before throwing the board inside. We thought we probably won’t be able to put the cooler in later, although to be fair, EVGA X58 FTW3’s CPU socket is almost on the edge of the board. All in all, we had fun setting up the Deep Silence 1.
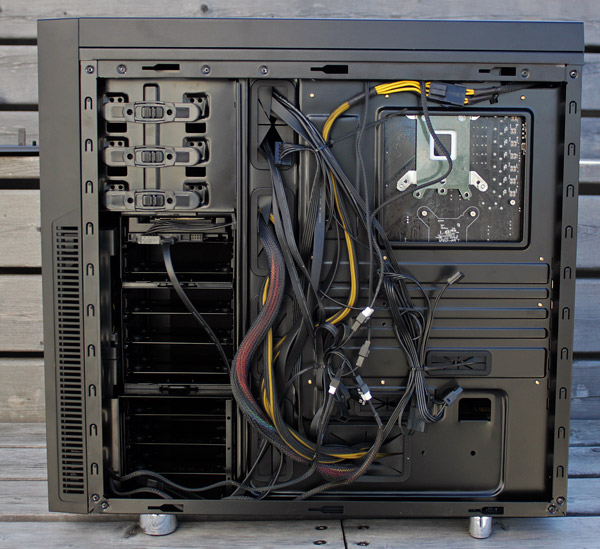
Not even a bunch of cables on the back will prevent the door from closing. It’s nice that the tie straps can be released if you pull the tiny part sticking out with your nail.
The Deep Silence 1 is quite roomy and most scenarios still leave the space you see on the right freed up.
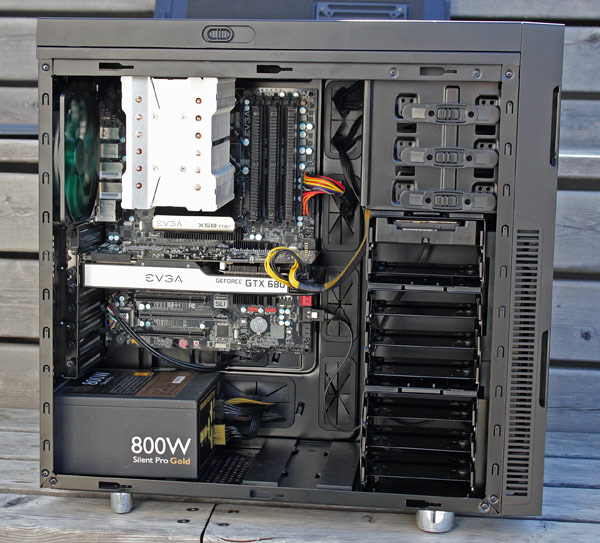
The Deep Silence 1 has eight expansion slots but our ATX motherboard, which is standard sized at 305mm, can only reach the seventh one. The 2cm between the motherboard and the PSU could’ve been utilized towards the top of the case, like with thicker water cooling radiators.
Cooler Master Hyper 612S fit nicely and we had no problems getting it in there, but it left just enough room for the top panel fan (picture below). However, as long as the cooler does not go over the edge of the motherboard, there will be room for a radiator on the top panel.
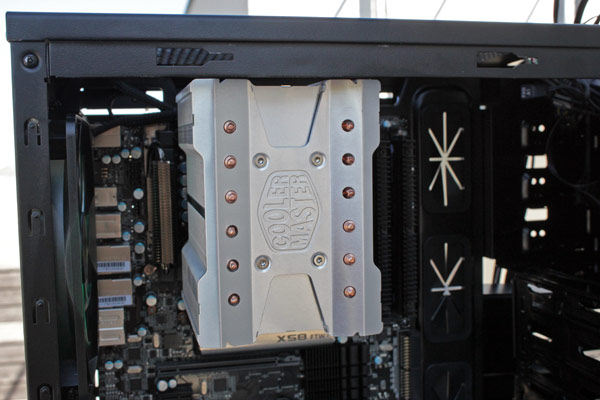
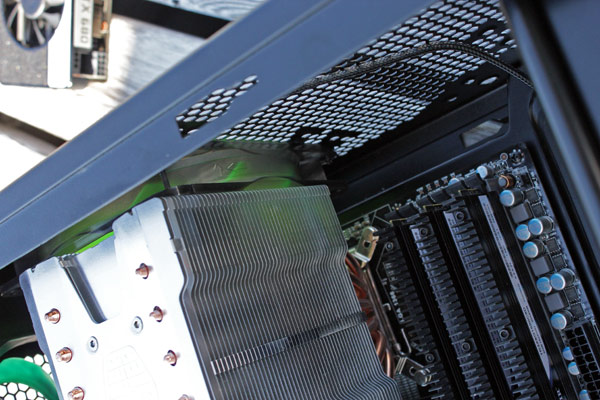
The top panel has many holes and it’s easy to get confused. You can mount a 200mm fan here as well, but we threw in a 140mm one.
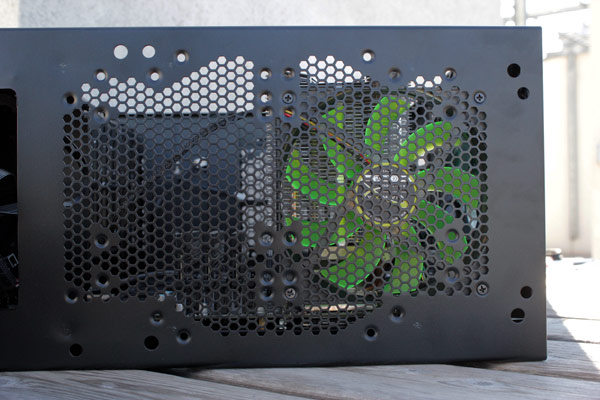
As we said before, maximum supported VGA length is 315mm (up to 445mm with the HDD cage removed) and maximum CPU cooler height is up to 185mm.
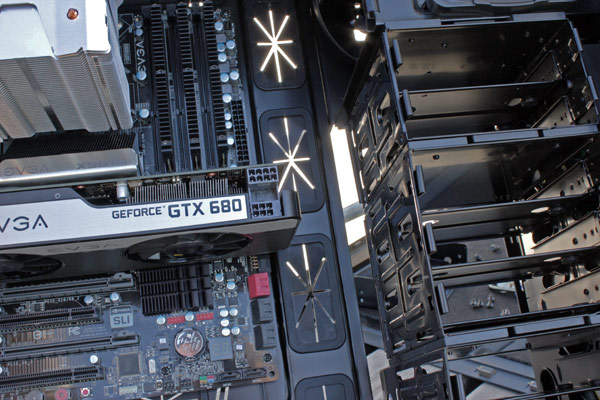
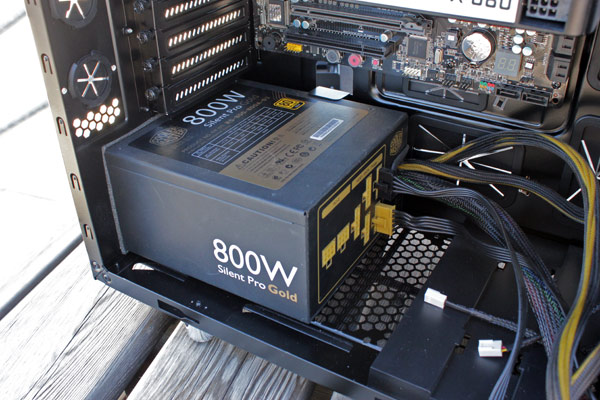
Various layouts with three HDD cages is among the Deep Silence 1’s greatest strengths. If you need a reference for the PSU, the Silent Pro 800W PSU (picture below) is 15.5cm long, and there is about 5cm left between it and the HDD cage (if you choose to put it there of course).
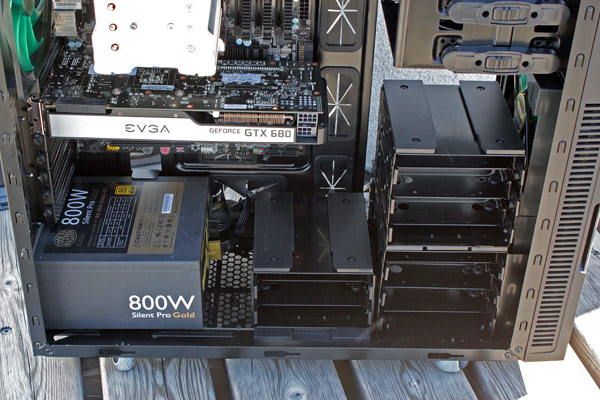
Note that front panel doors with sound insulation have their own set of common problems, mostly with gear that has many buttons sticking out, such as fan controllers. Thankfully, the Deep Silence comes with ha two channel controller supporting up to six fans (three per channel).
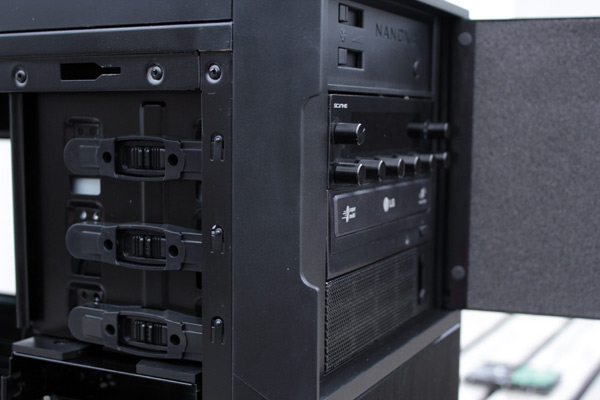
As we showed you earlier, all intakes (front, bottom, left side panel) are readily accessible and have easy to clean dust filters.
The top panel boasts the Air Chimney, which is controlled with a handle on the left side panel.

The expansion slot covers were a bit hard to take out. The problem is in the bent part that prevents smooth operation.
Once we finished everything and started up the computer, green LED lit up the power key. The fans in the case are painted green, but have no LEDs. Besides, who needs glowing fans in a closed case?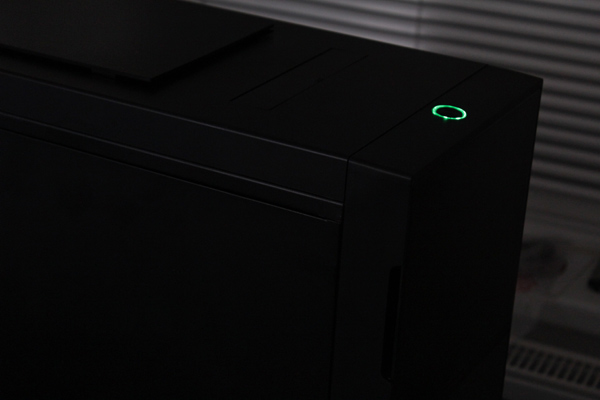
As far as performance goes, the three stocked fans do a good job, but longer gaming and more intense CPU usage will require opening the Air Chimney and venting the case out. You could also speed up the fans to the max – they won’t introduce much noise.
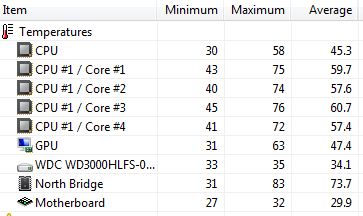
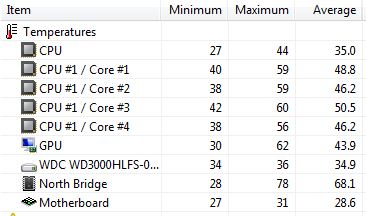
Running our GTX 680 Signature 2 with the Air Chimney opened and fans maxed out resulted in °63C. The GPU was fine but the CPU (QuadCore Intel Core i7-930, 3GHz) was dangerously aproaching the limit. Note however that the CPU cooler we used is semi passive.
Inserting one 14cm silent fan on the top panel turned to be very good investment and the image below speaks for itself. The top fan acted as a CPU cooler fan. Also if we compare the results, it is obvious that you can do away with three fans as long as your graphics card cooling is good.
Nanoxia definitely isn’t the first company to spring to mind when thinking of computer cases, as the company built its name making quality fans, but if the Deep Silence 1 is anything to go by, that is about to change. The name itself suggests that we’ll see more models and Nanoxia can surely give the competition a hard time.
The company aimed at making a silent case and this is where the Deep Silence 1 excels. Silent cases usually come with closed side panels, in order to keep noise to a minimum, and the Deep Silence 1 isn’t an exception. This contributed to a clean and simple, yet stylish look.
The Deep Silence comes stocked with three silent fans but supports up to seven fans. Nanoxia threw in some tricks for quick cooling boosts, no fans included. One of these tricks is called the Air Chimney, which is basically a mobile part of the top panel that can be raised to act as an exhaust. Users can counteract heat generation under the top panel by simply opening the Air Chimney and allowing the heat to escape.
Nanoxia made sure the Deep Silence 1 is up to the latest standards and the case brings USB 3.0, sound isolation on the front and side panels, modular HDD brackets, room for largest graphics cards and CPU coolers, etc. It is tough, stable and offers what should be enough for most users. We did notice that metal quality and finishing touches aren’t quite up to Cooler Master or Fractal Design standards, despite seemingly resembling some.
The Deep Silence 1 is currently listed at about €109, which we’d call some €10 too steep. On the other hand, this is Nanoxia’s first step on the market and what a step it is, so we’ll cut them some slack. The case is feature packed, perhaps more than some other cases in this price range, and is definitely the one to remember, so let the first one be crowned, we say.


